

Live streaming your DJ sets is easy with DJUCED! You don’t need to buy an external audio interface or another computer to stream your sets.
You can easily make DJUCED’s secondary master audio output available to other applications via a virtual audio device when you’re live streaming with applications such as OBS, Streamlabs OBS, or other broadcasting tools. (Don’t worry, we’re going to show you how)
Make sure you’ve downloaded the latest version of DJUCED before you start this tutorial.
Livestreaming your DJ sets is a great way to stay engaged with your friends, your fans or build a new audience.
And, it’s just plain fun!
Because video and sound quality are important, here’s a guide on how to set up your first live stream with DJUCED for optimal sound and visual quality.
Step 1 – Install a virtual audio device #
In order to set up live streaming between DJUCED and streaming software, you will need to install a Virtual Audio Device.
This Virtual Audio Device will be used to send the sound from DJUCED to your streaming software (Like OBS, Streamlabs OBS, etc.)
1. Download and install the virtual audio device #
On Windows, we recommend using:
Virtual Audio Cable
On macOS, we recommend using:
iShowU Audio Capture
or
BlackHole
2. Send the sound from DJUCED to Virtual Audio Device #
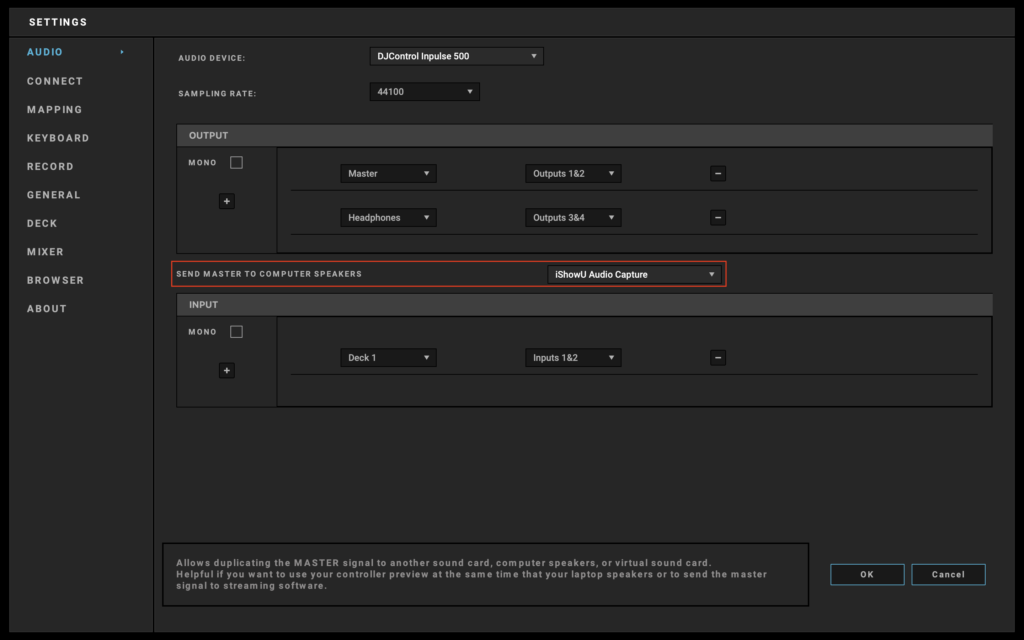
Now we need to set up DJUCED for sending the Master sound to the virtual soundcard.
- Open DJUCED settings
- Select the “Audio” tab
- Choose the Virtual Audio Device as secondary master audio (in this example we are using “iShowU Audio Capture”)
STEP 2 – SET UP YOUR STREAM WITH OBS (OR OTHER STREAMING SOLUTION) #
1. Download streaming software #
There’s plenty of solutions to stream yourself from a computer.
Actually, we recommend using OBS or Streamlabs OBS.
In the next examples, we will use OBS, because it’s totally free & widely used by lots of live streamers already.
2. Prepare your Hardware #
Here’s what we are using in our example:
- A Laptop with DJUCED and OBS
- A DJ Controller – like the Hercules DJControl Inpulse 500
- A Webcam
3. Open OBS #
When OBS is opened, you’ll need to add ‘Sources’.
These ‘Sources’ can be any number of things: video capture, audio capture, image, texts, etc…
Let’s start adding ‘Sources’
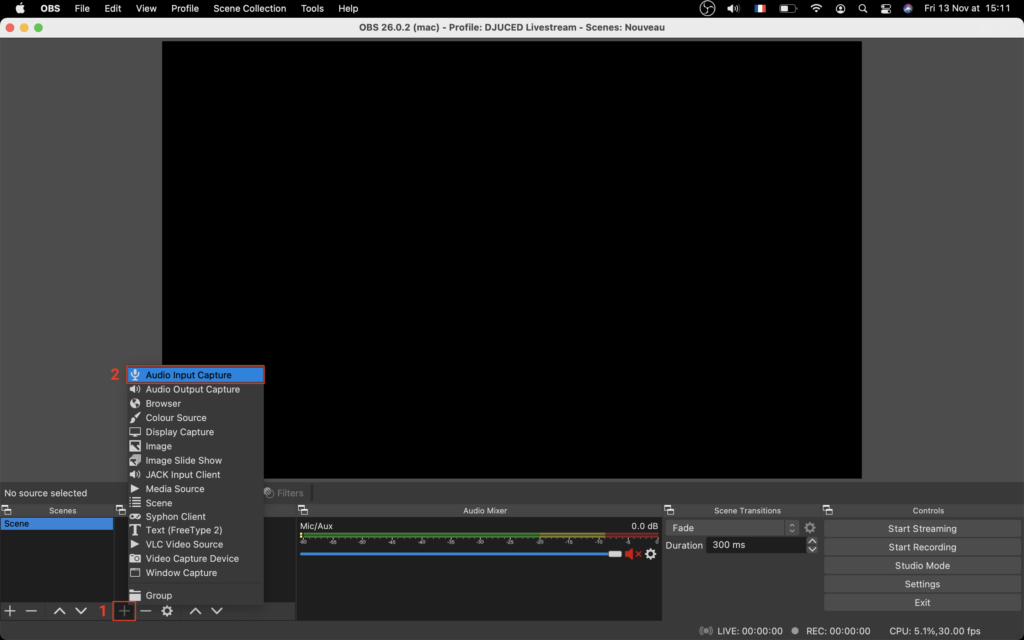
4. Add the sound coming from DJUCED #
- Click the ‘+’ sign on the source area
- Select the ‘Audio Input Capture’
Rename your ‘Source’ if you want.

Then, choose the Virtual Audio Device for this source. In this example: ‘iShowU Audio Capture’
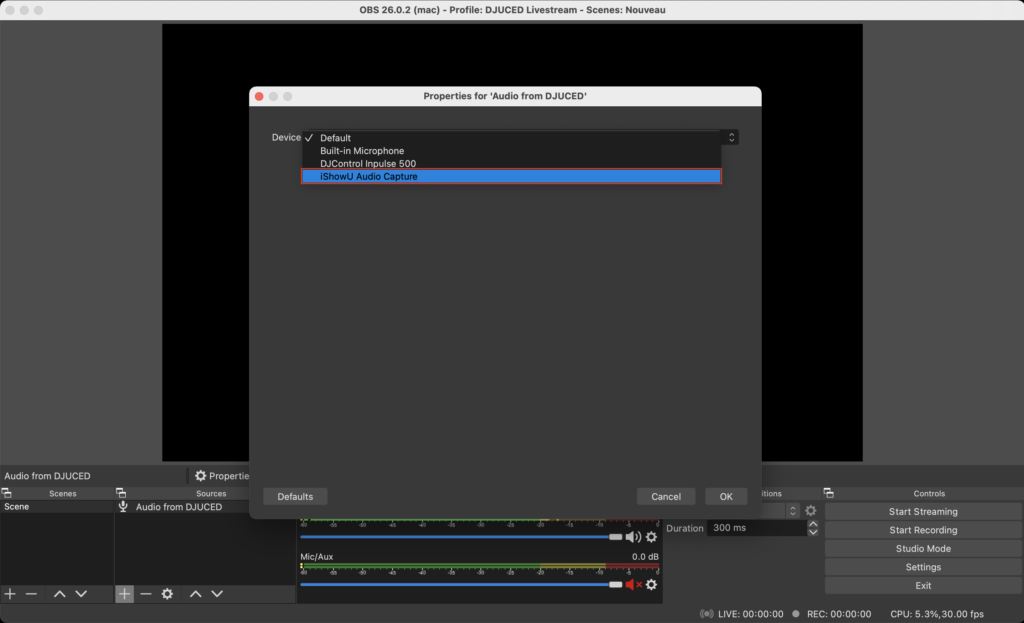
Play a song on DJUCED to check that audio is coming into your source.
Check the audio activity with the Vu-meter, like in the picture below.

Now that we have audio coming from DJUCED, it’s time to add some visuals to our Stream.
Let’s start with a camera.
5. Add a camera #
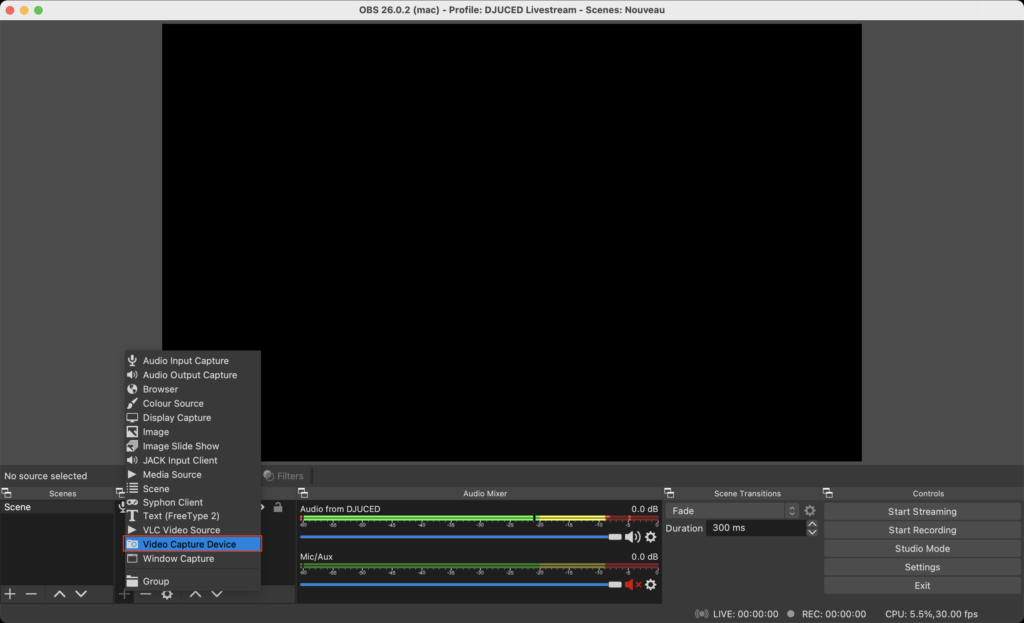
- Click the ‘+’ sign on the source area
- Select ‘Video Capture Device’
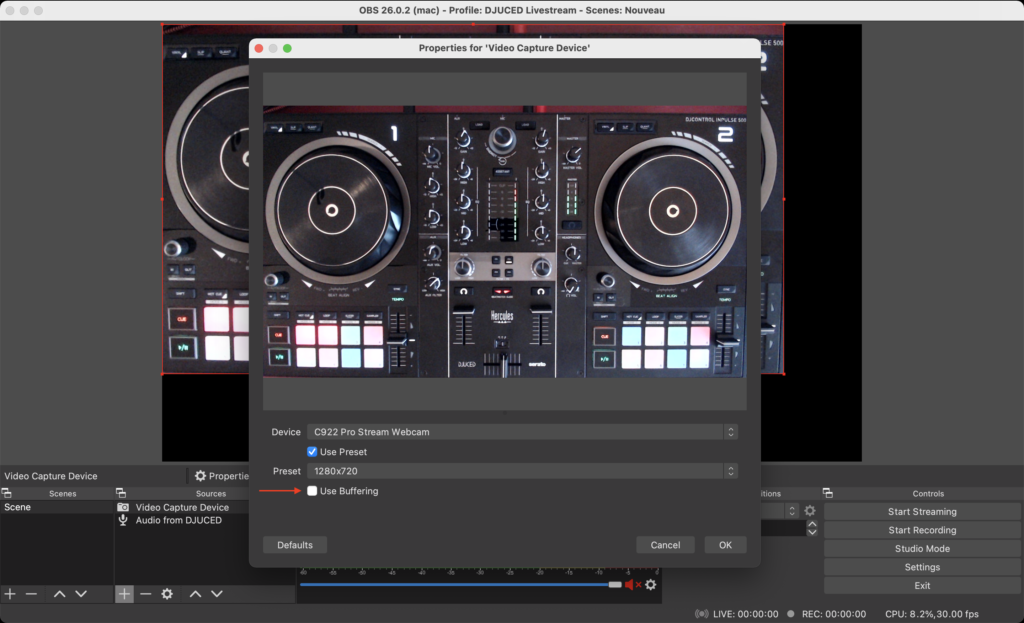
Choose a camera preset.
We recommend removing “buffering” to avoid your video being unsynced with the audio.
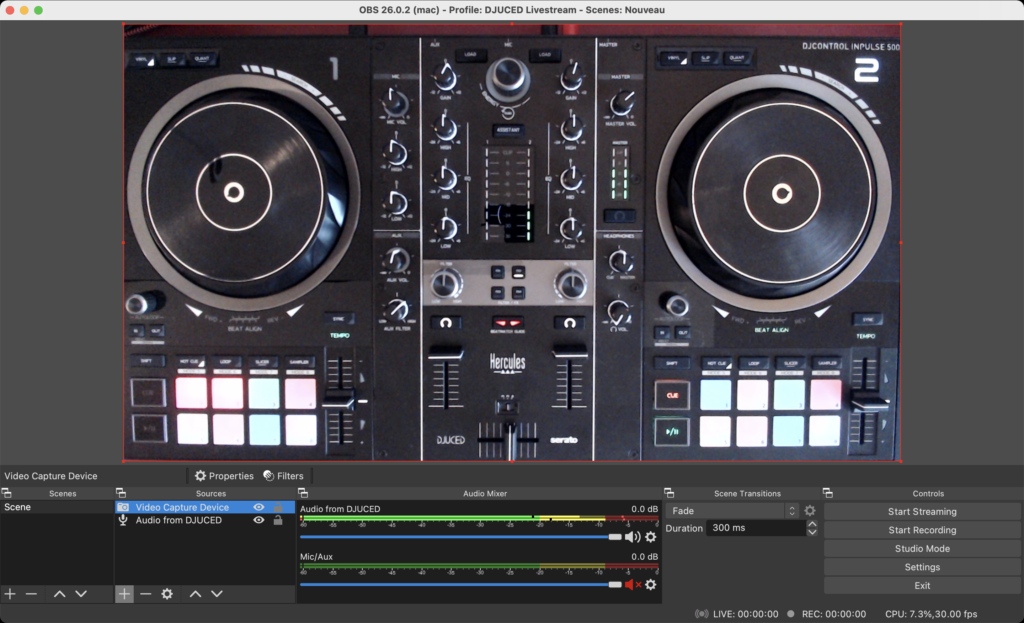
Position and resize your visuals by clicking on the corner of the visual and dragging to fill the Black area (called a Canvas).
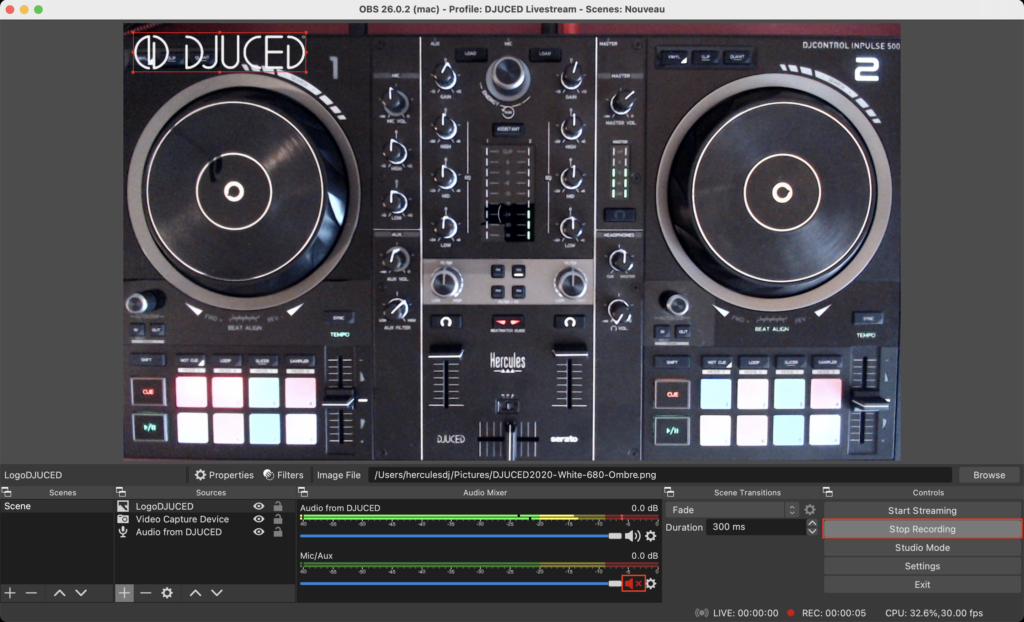
6. Add a logo #
We are now going to add a logo to the sources.
Click the “Image” option from the “+” menu in Sources.
Again, ‘Create New’ and name what you want. I called it “LogoDJUCED” and click OK
Then browse your desired image or logo.
We suggest using a .png format because it can handle transparency. (and it looks more professional)
Click ‘OK’ once you have found the right image.
You will probably have to resize and position your logo on your canvas.
Now you’re almost all set up in OBS.
Do a quick level check to make sure audio is being sent to OBS and be sure to mute the unused audio sources, like the internal/webcam microphones.
We suggest pressing ‘Record’: it will record and save the video in your “Videos” folder, so you can check everything is working as expected.
STEP 3 – CHOOSE A STREAMING SERVICE #
Now you’ll need to get your streaming key from whatever streaming platform you want to use.
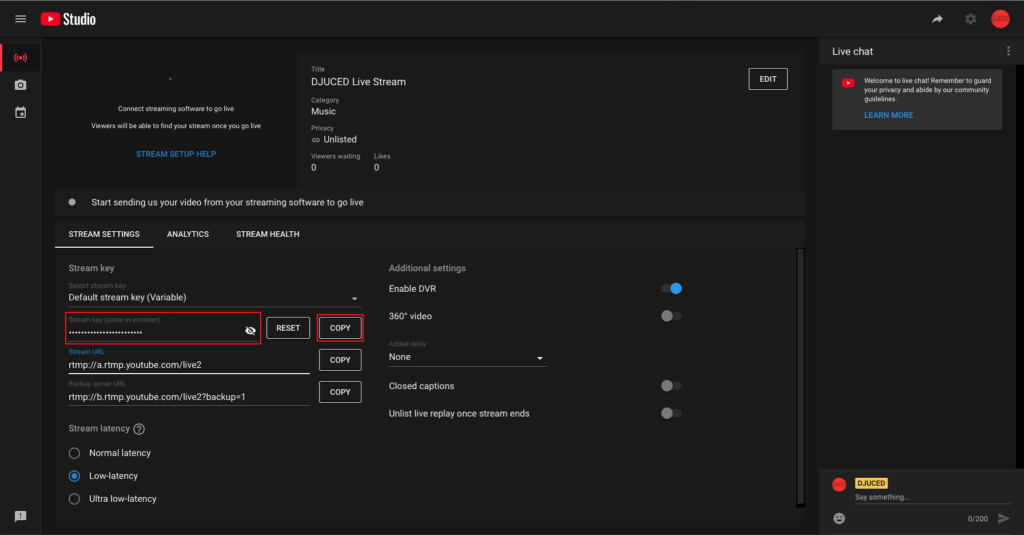
In this demo, we’re using Youtube Live.
Go into Youtube Studio, follow the instructions to create your stream, and copy the “Stream Key”.
This key allows your OBS software to connect to your Youtube account, control your stream, and go Live.
Because of this, it’s very important that you keep this key to yourself and not share it; anyone with the key can go LIVE on your account.
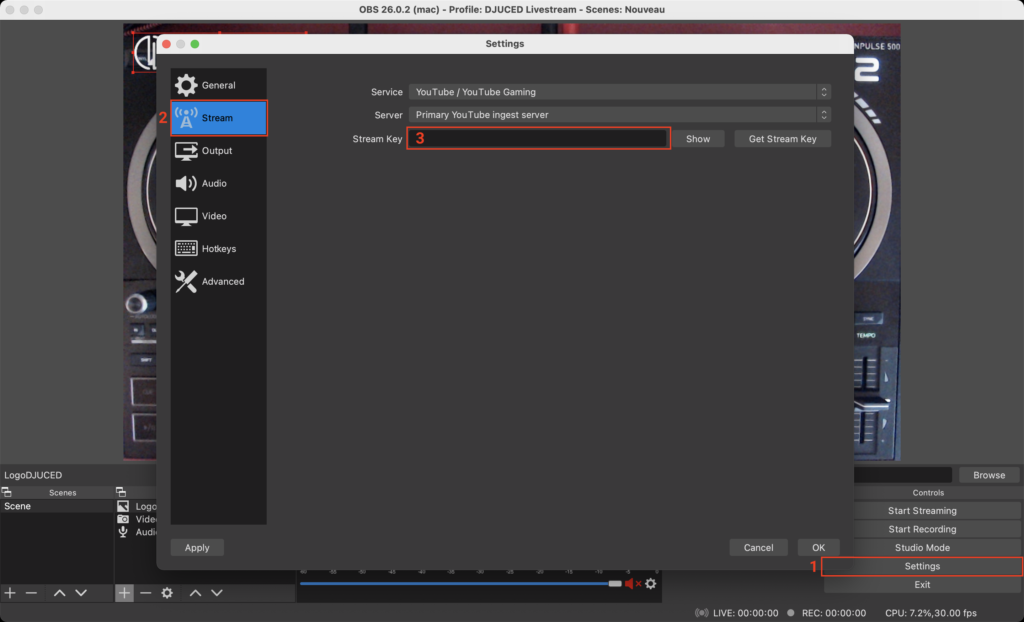
Go back into OBS, then:
- Open the Settings
- Go into the “Stream” tab
- Paste your stream key
Now you’re almost all set up in OBS.
Do a quick level check to make sure audio is being sent to OBS and be sure to mute the unused audio sources, like the internal/webcam microphones.
We suggest pressing ‘Record’: it will record and save the video in your “Videos” folder, so you can check everything is working as expected.
Save your settings, so it will be ready for the next time.
It’s now time to make your audience happy…
Press ‘Start Streaming’ to go live, and enjoy playing your music…