

In the world of digital DJing, achieving clean, powerful, and distortion-free sound is essential—not only for the audience’s experience but also for the safety of sound systems. Two vital tools that help DJs maintain audio quality are master headroom settings and the limiter. While often overlooked by beginners, these features play a crucial role in ensuring a balanced and controlled output.
Note : Limiter setting and new Master Headroom settings has been introduced since DJUCED 6.3.4.
Earlier versions only propose Master Headroom.
What Is Master Headroom? #
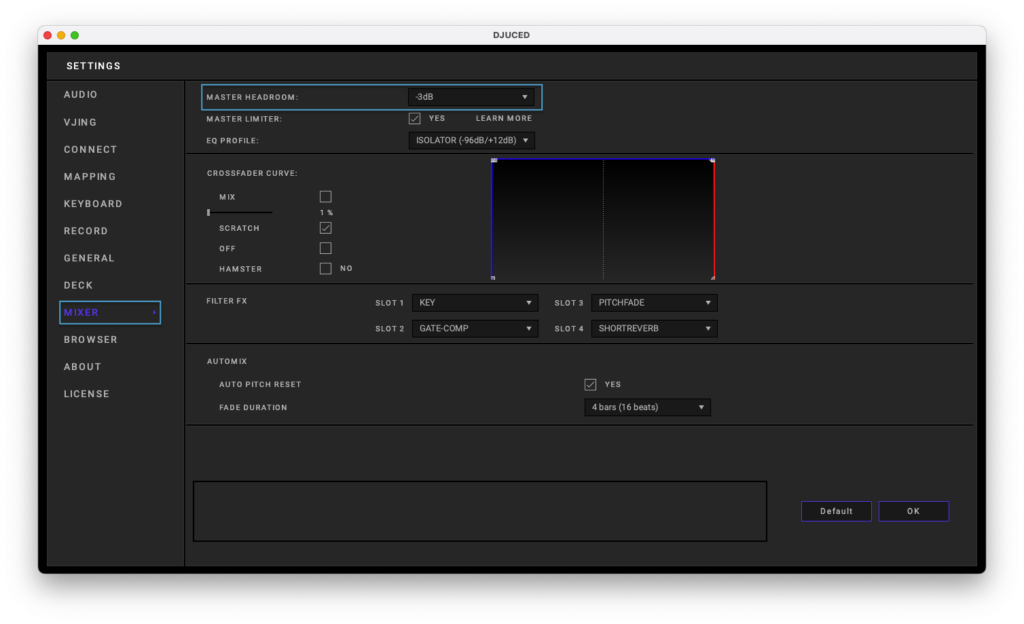
Master headroom refers to the amount of volume margin available below 0 dB (the digital clipping point). In DJUCED settings, headroom is set in decibels, such as -3 dB, -6 dB, or even -12 dB. This buffer ensures that when tracks are mixed—especially during transitions, EQ boosts, or when effects are applied—the combined signal does not exceed the maximum output level.
Why Master Headroom Matters #
- Prevents Clipping: When digital audio exceeds 0 dB, it clips, resulting in harsh distortion. Headroom ensures that even aggressive mixes remain below this threshold.
- Allows for Dynamics: Some genres, like techno or house, rely on subtle dynamic changes. Headroom keeps those dynamics intact, preventing everything from sounding flat or overly compressed.
- Better Compatibility with External Systems: Sound engineers often prefer a signal with reasonable headroom to avoid sudden spikes or overloads in the PA system.
- Cleaner Mixes: With headroom in place, there’s less risk of unwanted digital artifacts during busy sections of your set.
The Role of the Limiter #
A limiter is a dynamics processor that prevents the audio signal from going above a set threshold—usually 0 dB. Unlike headroom, which is passive, the limiter actively controls peaks in real time.
Why You Should Use a Limiter #
- Safety Net for Peaks: Even with headroom, sudden volume spikes can occur from unexpected effects or hot cues. A limiter catches those peaks and tames them.
- Protects Sound Systems: Clipping or overly loud signals can damage speakers and amplifiers. A limiter prevents harmful overloads.
- Maintains Consistent Loudness: Especially useful in club or live settings, a limiter helps keep your overall output steady and professional.
- Confidence During Performance: With a limiter engaged, DJs can focus more on their creativity without constantly worrying about volume levels.

Best Practices #
- If you are not confortable with gain adjustment, set your master headroom to at least -3 dB in your DJ software for 2 tracks mixing, and -6 dB for 4 decks mixing.
- Keep individual track gains balanced—avoid pushing any track close to red. (No, it’s not because you are redlining that you will headlining 🙂)
- Enable the limiter, especially in live or loud environments.
- Don’t rely solely on the limiter—use it as a backup, not a crutch. If you push too hard on the limiter, your sound will be squashed, offering a boring dynamic signal to your audience.
Conclusion #
Using master headroom and a limiter in your DJ setup is not just about technical correctness—it’s about delivering the best possible sound to your audience. These tools help maintain clarity, avoid distortion, and give you more control and peace of mind during a performance. Whether you’re playing at a club, a festival, or streaming from home, setting them up properly is a simple step that can make a huge difference.